Lomography LomoChrome Metropolis 120 Film Review | Sample Photos with a Holga GCFN Toy Camera in Lisbon, Portugal!

(By using the links and/or codes in this blog post it supports Myles Katherine Photography. We may get a small kick back by you doing so.)

Happy New Year! It’s 2025, can you believe it? I was chatting with a friend the other day and realized, that means it’s been five years since the infamous 2020. That revelation makes my insides hurt, but if I think about all of the things I’ve accomplished and survived since then, it makes a lot more sense. It’s never a good idea to look at the big picture, especially when it comes to all of the catastrophes of the world. I’ve learned that life is a little less overwhelming if you just focus on the day to day.

I have a lot of travel plans this year, but also I’ve been feeling a strong urge to be cozy in my house. Maybe it’s the fact that we have a new puppy, or maybe it’s because I’m turning 36 in February and I’m just getting old, or maybe it’s just pure exhaustion from the last five years, but traveling just sounds like a bit much at the moment. I know I’ll plan a trip for my birthday, but for now, I’m going to enjoy these snowstorms and my crazy little puppy, and spend my days catching up on blogging and editing.

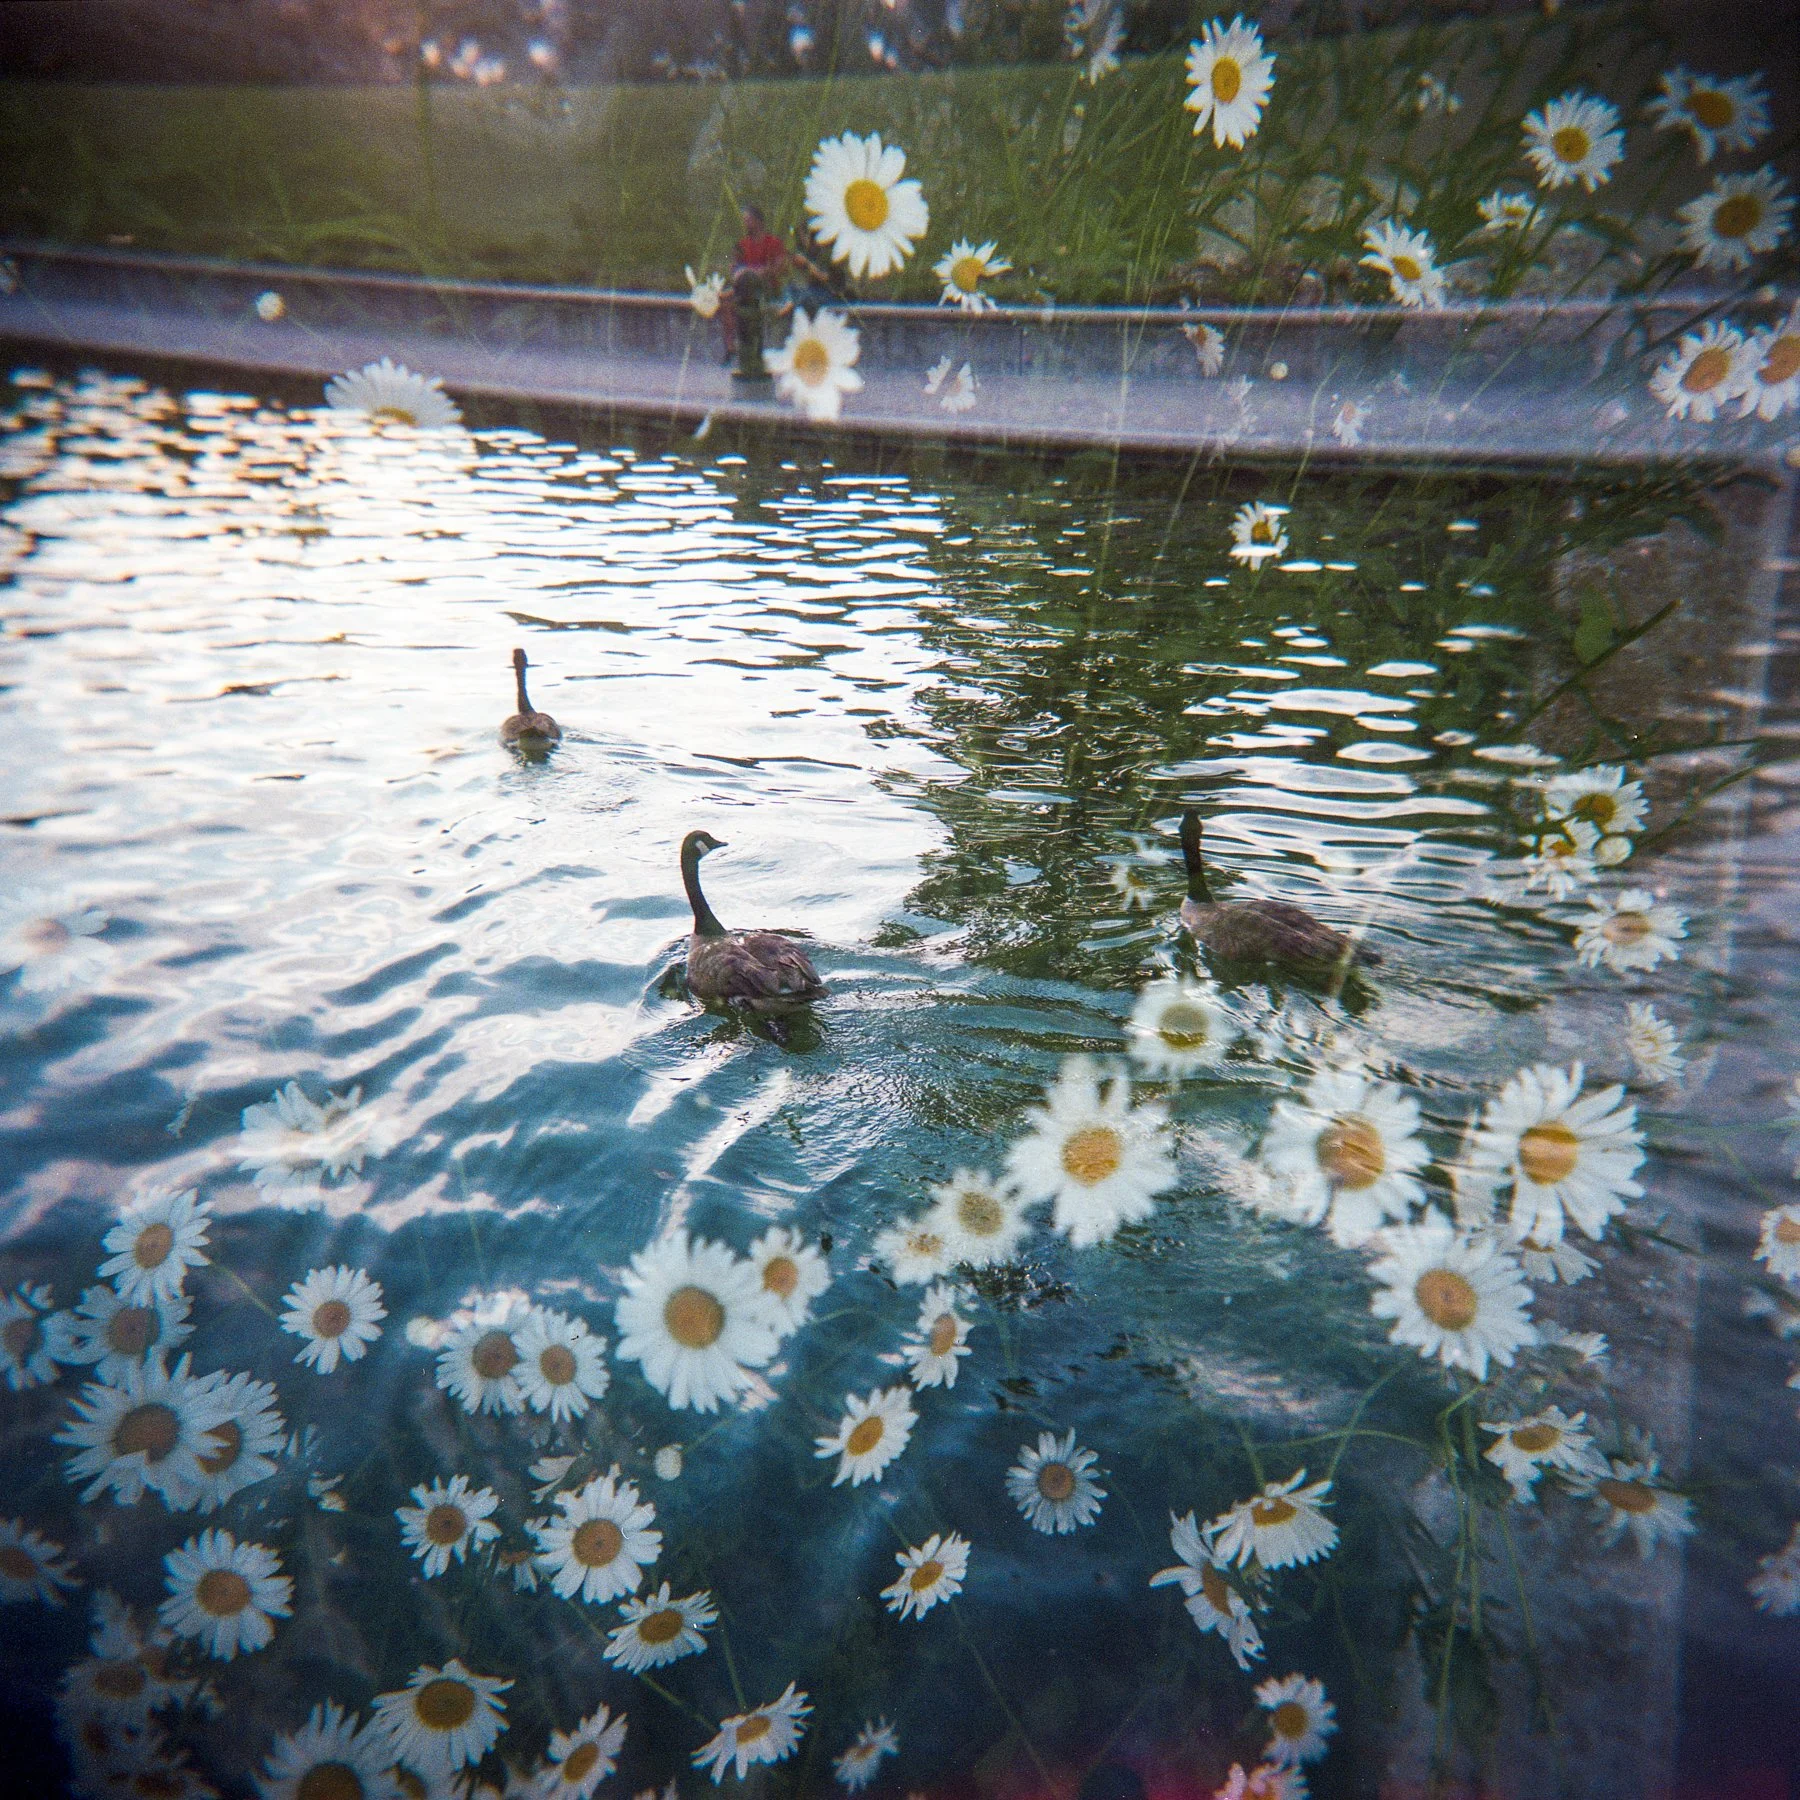
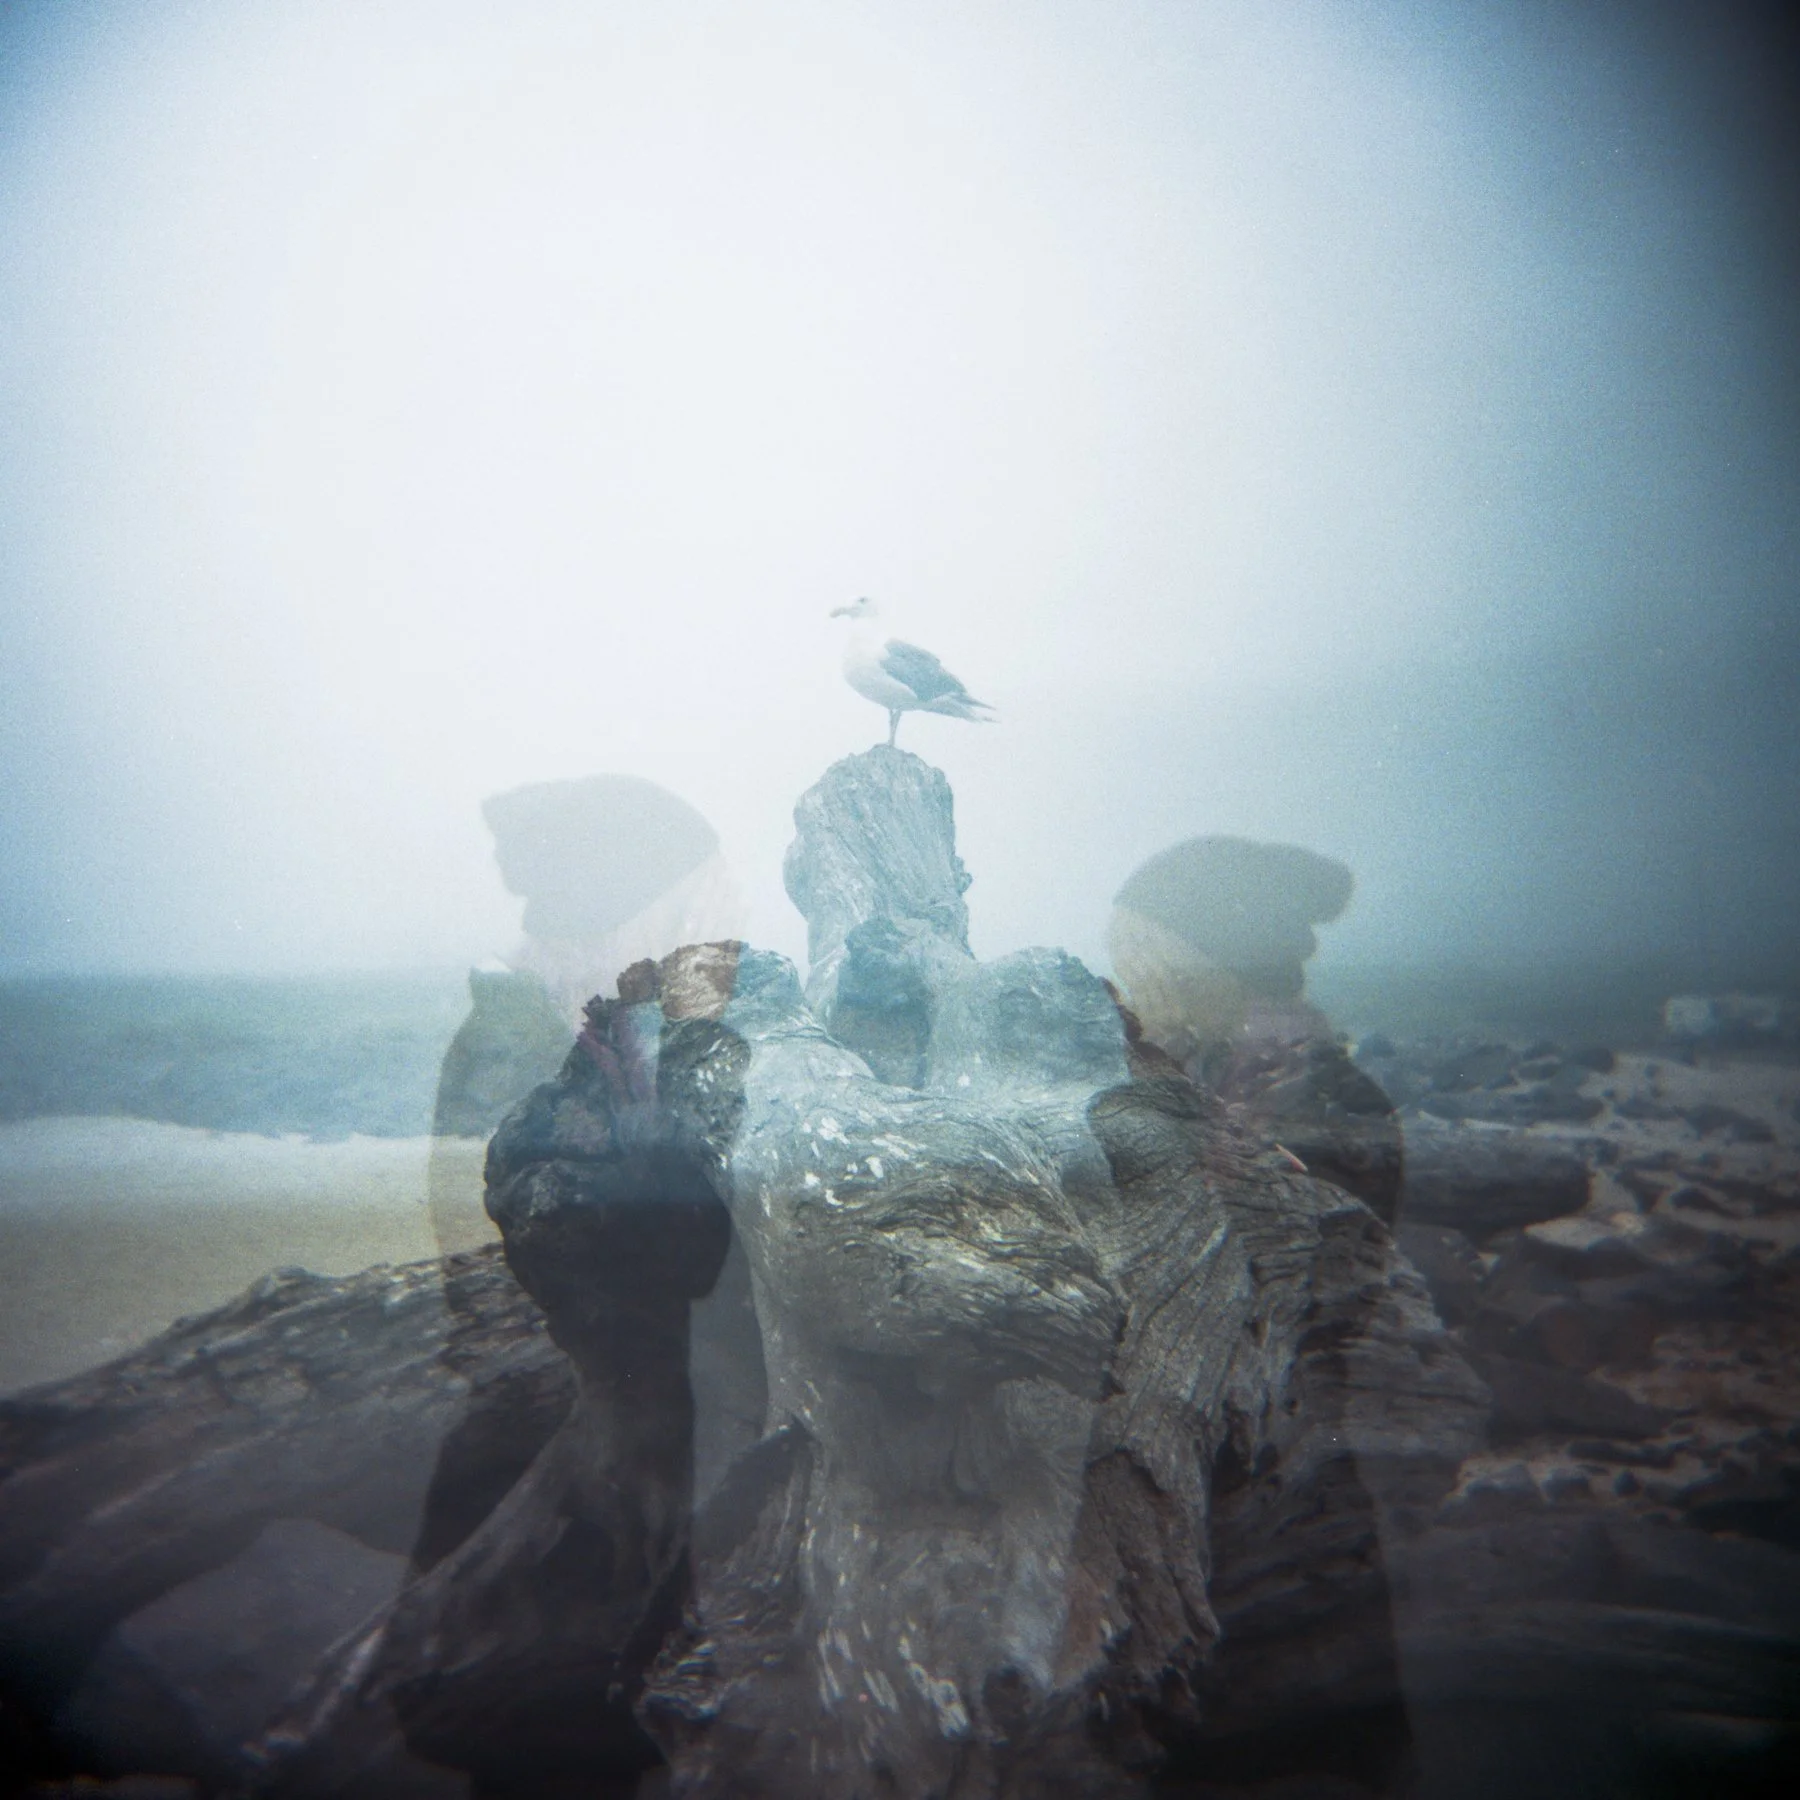
I’ve been meaning to share these images from my trip to Portugal for a while because I find Lomography’s LomoChrome Metropolis to be a very unique film stock. I don’t typically go for film that is desaturated in any way, just because I prefer either bright color or black and white. But I have an affinity for Lomography’s LomoChrome film and I’m particularly obsessed with the LomoChrome Purple film. I like the LomoChrome Turquoise as well, but the purple film holds a special place in my heart. I found that the LomoChrome Metropolis actually scans similarly to the LomoChrome Purple. And by that I mean, the film scans I made at my house with my Epson V750 Pro Scanner didn’t look too different than the scans I get with LomoChrome Purple. I find that Metropolis images have a slight purple undertone, which makes me think that it’s the same film as the purple, but just a little less saturated. The Metropolis film also tends to run a little cheaper than the purple film, so if you’re interested in just testing out one of these funky films without breaking the bank, Metropolis is probably your best bet. You’ll find that samples of this film range from golden to greenish to purple-y blue tones, but that’s kind of the fun of this film. You can really adjust the tones during or after scanning to fit your personal style. You can either make it more vintage by embracing the desaturated vibes, or you can add warmth or coolness if you want a different undertone. It’s really a fun film though and I’ll definitely be shooting more of it in the future! For these images, I used a Holga GCFN (my favorite camera in the world). You can read more about the Holga GCFN on my blog here. Or you can watch my full review of the camera on my YouTube channel here! All of these photographs were taken in Lisbon, Portugal and the majority were taken in Jerónimos Monastery, a stunning late Gothic style monastery by the waterfront.

The Metropolis film comes in 35 mm or 120 formats. I just recently finished up a disposable 35 mm camera with Metropolis preloaded inside. You can pick one up on Amazon if you find a disposable camera more approachable. I always love shooting with disposable cameras. There is a special retro vibe that you get with disposable cameras that is just impossihle to replicate.

If you found this post helpful or inspiring, I’d love it if you considered signing up for my Patreon! For as little as $1 a month, you’ll get early access to all of my YouTube videos, plus tons of photos that I don’t post anywhere else. Depending on which tier you choose, you could also receive seasonal prints and/or discounts! I always use all of the proceeds towards cameras, film & processing.

If you have any questions, I’m always happy to help! You can contact me here, or leave a comment below! Thanks so much for stopping by! You can also check out my Amazon storefront for more camera/film recommendations. :) Have a magical day!

<3 Myles Katherine

WHERE TO BUY:

Lomography LomoChrome Metropolis 120 film

Amazon

Adorama

eBay

Lomography LomoChrome Metropolis 35 mm film

Amazon

Adorama

eBay

Lomography LomoChrome Metropolis Disposable 35 mm Camera

Amazon

Adorama

Holga 120 GCFN Camera (read more about the Holga GCFN on my blog here!)

Amazon

eBay

KEH Camera

Here is a roll of 120 LomoChrome Metropolis that I shot with my Holga GCFN in Portugal!

Shooting Kodak Ektar 100 with a Holga GCFN in Portugal!

(By using the links and/or codes in this blog post it supports Myles Katherine Photography. We may get a small kick back by you doing so.)

I’ve been forcing myself to step outside my box and try out some new film stocks lately. I tend to stick with Lomography film or Kodak Portra 400 and Kodak Gold 200, but Kodak Ektar 100 is one of those films I always hear about but just never got around to trying. I decided to take a roll with me to Portugal and test it with my Holga GCFN. After getting my film back and scanning it, I’ve definitely learned a few things about it. It has an overall blue undertone, that particularly shows up if you’re shooting in lower light (like a cloudy day or shadowed setting). It definitely favors bright lighting and sunshine. The next time I shoot with it, I’ll be sure to take it with me to the beach on a sunny day. However, the blue undertones add a nice moodiness that is unlike any other film I’ve shot with. It has a dreary graininess that is endearing and calming in a way. In general though, it’s a good rule of thumb to shoot in bright light with any film under 200 ISO. Sometimes, I forget what kind of film I put in my Holga so I end up being surprised by the results. Next time I load my Holga, I’m planning to tape a piece of paper on the back of my camera with the film stock I put inside just so I don’t forget!

I also posted a YouTube video about shooting with Ektar 100 with the Holga in Portugal, so if you’d like to see the making behind these photos, make sure to give my video a watch here!

If you found this post helpful or inspiring, I’d love it if you considered signing up for my Patreon! For as little as $1 a month, you’ll get early access to all of my YouTube videos, plus tons of photos that I don’t post anywhere else. Depending on which tier you choose, you could also receive seasonal prints and/or discounts! I always use all of the proceeds towards cameras, film & processing.

If you have any questions, I’m always happy to help! You can contact me here, or leave a comment below! Thanks so much for stopping by! You can also check out my Amazon storefront for more camera/film recommendations. :) Have a magical day!

<3 Myles Katherine

WHERE TO BUY:

Kodak Ektar 100 - 120 film

Amazon

Adorama

eBay

Kodak Ektar 100 - 35 mm film

Amazon

Adorama

eBay

Holga 120 GCFN Camera (read more about the Holga GCFN on my blog here!)

Amazon

eBay

KEH Camera

How to Create Double Exposures and Multiple Exposures with a Holga Toy Camera | 5 Simple Tips and Tricks with Sample Photos!


This post contains affiliate links and I will be compensated if you make a purchase after clicking through my links. 

How Do You Create Double Exposures and Multiple Exposures with a Holga Toy Camera?

This HAS to be my most frequently asked question. If you follow my work you know I’m obsessed with the Holga and multiple exposures (specifically, the Holga GCFN). I still remember the very first double exposure I ever took and the excitement I felt when I realized what had happened. I suddenly felt like the opportunities were endless when it came to photography. I realized that photography didn’t necessarily need to mimic real life. I could create a world that didn’t exist, by merging photos taken directly from reality. That juxtaposition blew my mind and really catapulted my interest in photography.

It might seem intimidating at first when it comes to creating multiple exposures. I think there’s an innate and expected fear that they’re going to be TERRIBLE. That they won’t make sense. That no one will know what they’re looking at. But guess what, that’s FINE! In fact, it’s better than taking the same boring photo that everyone else takes. It takes some time to get used to layering images and understanding how the final product is going to turn out. But even now, with a decade of experience under my belt, I still don’t feel like I have complete control over my multiple exposures. I always have an expectation in my mind and it never quite fits with how I envision them. Either they’re not as good as I’d hoped, or they’re even better. And usually the ones that I’m just messing around with end up being the best. It’s really better NOT to plan. To just try out different textures and faces and landscapes and see how they turn out.

In case you’re having some trouble getting started though, here are a few tips for creating multiple exposures with a Holga camera. The Holga is one of the best cameras, in my opinion, to try out multiple exposures. But first, you have to understand HOW to take a multiple exposure. It’s actually SUPER simple. After taking a photograph, you just simply don’t wind the film advance dial at all. You just take another photo right over top of the first one. And you can do this as many times as you want, which is why I love the Holga so much. A lot of film cameras will automatically advance to the next frame, leaving you without the option to shoot over top of the first frame. The Holga is meant for multiple exposures. It’s very easy to accidentally take a multiple exposure with the Holga too, simply because it is a manual advance camera. So oftentimes, you might nor even mean to take a photo over top of another one, it just might happen. Actually, it WILL happen at some point if you use the Holga. It’s just part of the magic of the camera!

5 Simple Tips and Tricks for Creating Incredible Double & Multiple Exposures with the Holga Toy Camera

Tip #1 - Try out a portrait over top of a landscape!

This is probably one of my main choices for creating double exposures. It usually ends up quite interesting and beautiful. I’ll shoot the first image on the infinity/mountain setting of the Holga and then shoot the second image as a close-up portrait using the single-person setting on the Holga.

Tip #2 - Try asking your subject to move slightly / try a new pose in-between images

This is another go-to for me when it comes to double exposures. It ends up creating very ghostly, spooky images that are incredibly unique and unpredictable. These are often my favorite photos to get back after a photo shoot.

Tip #3 - Try out different close-up textures as your second image

This one is somewhat of a risk, but oftentimes pays off! If the texture is too much, it can sometimes end up being a big indecipherable mess. But other times, it can add a bit of mystery and atmosphere to your photo.

Tip #4 - Try flipping your camera upside down for a second shot of the same subject

This is really fun to try with cityscapes, buildings and landmarks, mostly because they don’t move and you have enough time to plan out your shot.

Tip #5 - Try having your model step out of the second shot, but keep the background the same

This creates a very ghostly vibe, because the model becomes somewhat hazy and somewhat see-through. This is definitely another one of my favorite multiple exposure methods when using the Holga.

I’ve included a few more samples below of my favorite double/multiple exposures I’ve taken over the years with the Holga. It’s gotten to a point where I won’t even buy a camera anymore if it doesn’t have the option for multiple exposures! It’s become a huge part of my process and I feel extremely limited now when I’m not able to create them. If you’re interested in multiple exposures, you should definitely pick up a Holga and try it out! You can also check out my full review and blog post about the Holga here. Or you can check out my YouTube video! I LOVE the Holga. My main advice though is to be patient when you’re first starting out. You can’t expect perfection when it comes to the Holga. It has a mind of its own. But if you’re willing to learn its eccentricities, it will surprise you.

CAMERA:

Purchase a Holga 120 GCFN on Amazon

Purchase a Holga 120 GCFN on eBay!

Purchase a Holga 120 GCFN on KEH Camera

FILM RECOMMENDATIONS:

Lomography 400 120 film

Kodak Portra 160 120 film

Kodak Portra 400 120 film

#ad

If you’re interested in supporting my work and seeing lots more videos in the future, be sure to check out my Patreon! As a patron, you’ll receive early access to my YouTube videos, as well as access to never-before-seen images and seasonal prints, depending on the tier you sign up for.

Feel free to leave any thoughts/comments/questions/concerns below! Thanks so much for stopping by. And don’t forget to stop by my Amazon storefront for more camera/film recommendations. :)

<3 Myles Katherine